Rainbow Piñata Cake
- Not too tricky
- 1:55 h
- 18 ingredients
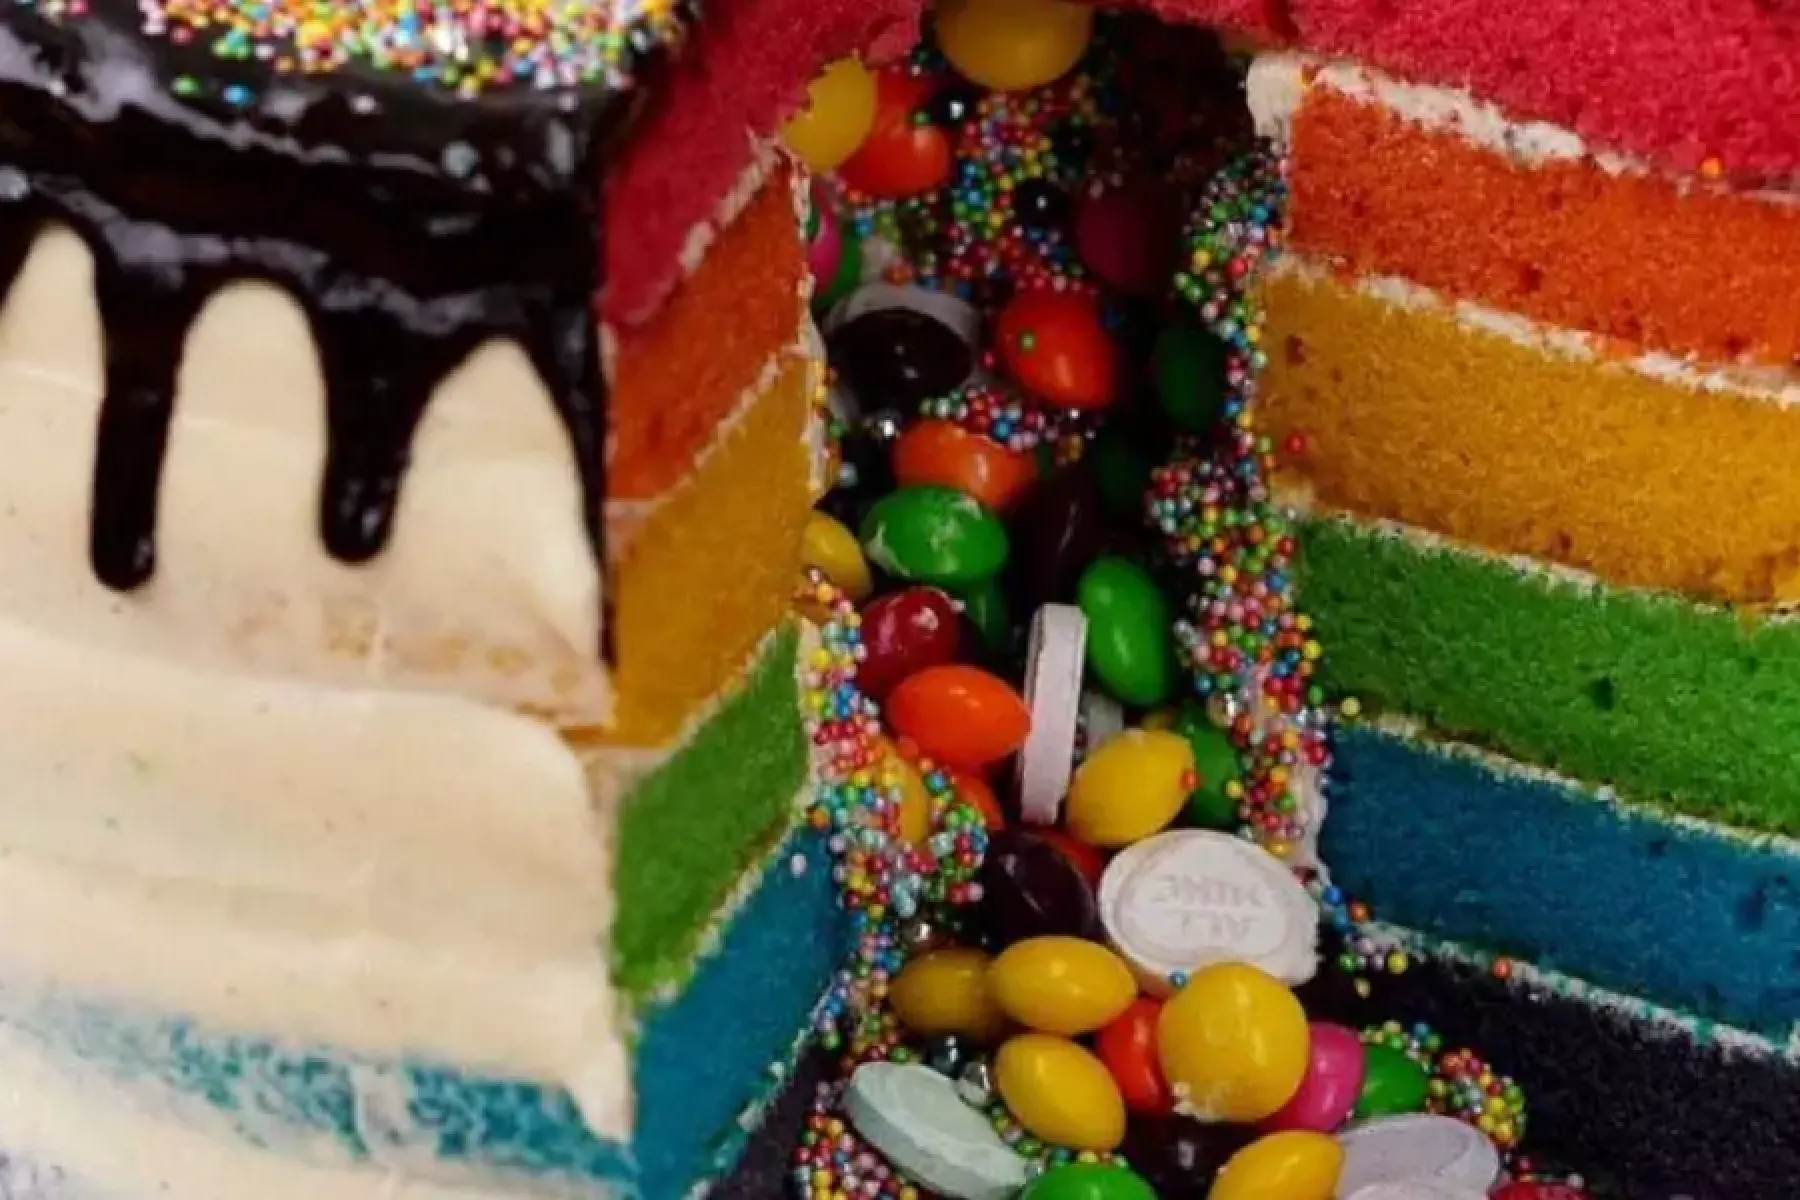
We invited the lovely Dani from Vida to come to the studio and bake "something special”. She responded saying, “I can do special”... she certainly wasn’t lying. Whether you're looking to bake a dairy free kids birthday cake recipe or to have a slice or two with your tea, this is a true show stopper of a plant-based cake recipe. Here’s how you can make “special” happen in your kitchen.
Serves: 4
Ingredients
For the cake
- 1 tsp salt
- 1 tsp xanthan gum
- 1 tsp baking soda
- 1 tsp baking powder
- 1 tbsp vanilla essence
- 300g plain flour
- 120g caster sugar
- 180ml sunflower oil
- 420ml soy milk mixed with 2 tbsp white wine vinegar
- 6 ½ tsp food colouring in different colours
For the icing
- 1 tbsp vanilla essence
- 180g plant-based butter
- 180g plant-based shortening (aka Trex)
- 720g icing sugar
For chocolate ganache
- 15g coconut oil melted
- 30ml agave syrup
- 15g cocoa powder
For the piñata filling
- plant-based sweets
Decoration
- plant-based sweets
Before you start
Preheat oven to 180°C | Food processor | 6 cake tins | 6 mixing bowls | Cookie cutter | Spinning cake stand
Step 1
First, make the cakes
- Sift the flour, caster sugar, raising agents and salt into the food mixer jug, put the jug on the mixer and turn it on
- Pour the vegetable oil, soy milk with white wine vinegar and vanilla extract into the mixer and mix it until you have a good batter
- Pour equal amounts of the mixture into 6 separate mixing bowls
- Mix the 6 food colourings into the 6 separate bowls to create coloured cake mixture
Ingredients
- 1 tsp salt
- 1 tsp xanthan gum
- 1 tsp baking soda
- 1 tsp baking powder
- 1 tbsp vanilla essence
- 300g plain flour
- 120g caster sugar
- 180ml sunflower oil
- 420ml soy milk mixed with 2 tbsp white wine vinegar
- 6 ½ tsp food colouring in different colours
Step 2
Then, bake the cakes
- Pour the mixtures into 6 separate cake tins and bake the cakes for 180℃ for 25 minutes (it could be wise to bake two at a time so you get an even bake as oven temperatures vary from shelf to shelf)
- Take the cakes out of the oven and let them cool down to room temperature
Step 3
Then, make the icing
- Put the dairy free butter and the shortening into the mixer and mix them together until you have a thick, even cream
- Pour the rest of the ingredients into the mixer and whizz them together until you have a nice, thick icing.
- Put the first cake on the spinning cake stand and use a cookie cutter to cut out a hole in the middle of the cake.
- Cover the top of the sandwich with a layer of the icing sugar.
- Put the second cake on top of the first and then repeat the process until all the cakes, apart from the top layer, are stacked on top of each other with icing in-between the cakes.
Ingredients
- 1 tbsp vanilla essence
- 180g plant-based butter
- 180g plant-based shortening (aka Trex)
- 720g icing sugar
Step 4
Next, hide the sweets in the cake and ice
- Pour loads of sweets into the hole in the middle of the cake (make sure it’s full of sweets)
- Spread icing over the top of the cake and put the last layer of cake on top
- Ice the whole cake, making sure you ice the sides slightly so you can see the colours of the cake popping through
- Put the cake in the fridge for around 30 minutes
Ingredients
- plant-based sweets
Step 5
Then make the ganache, decorate and serve!
- Mix the ganache ingredients together in a mixing bowl so you have a nice thick creamy sauce
- Pour the ganache into the middle of the top of the cake and very carefully spread it to the edges of the cake
- Very carefully spread the ganache off the sides of the cake so it dribbles down the sides (be careful here - less is more in this instance)
- Sprinkle sweets all over the top of the cake and put it into the fridge for 15 minutes to firm up the ganache
- Take the cake out of the fridge and cut it carefully - be sure to get your phone ready because it’s going to be VERY instagramable
Ingredients
- 15g coconut oil melted
- 30ml agave syrup
- 15g cocoa powder
- plant-based sweets

